Top Menu

Archive | Care

Stainless steel stains and spots

A customer asks:

One of the pans has black spots and fuzzy grey ones in the interior (silver toned) pan. What are those spots and how do I get rid of them?

Last year we wrote an article on removal of hard water stains; the grey spots are likely hard water stains.

The black spots are likely burnt on food that gets stuck in pits that are formed when cooking with acidic foods, like tomato sauce.  I’ve seen some cookware pieces with pretty prominent pits, and it isn’t hard to imaging food getting burn on in those pits and resisting removal by scrubbing.  Here is a picture we found from an article on stainless steel stains:

To remove the hard water stains, adding some vinegar and scrubbing with a Scotch-Brite pad, or balled up aluminum foil works quite well.

To remove the black spots, you can try adding vinegar and then some baking soda, and letting it soak, then scrubbing well with a Scotch-Brite pad.

In both cases, a good polish with Bar Keepers Friend will help get rid of any remaining residue.

The pits may not fully disappear, as that would require significant refinishing of the inside of the pan, but you can minimize the appearance by regularly cleaning in this way.


0

When Bakelite emits a foul odor

When we think of overheating plastic, we think of plastic melting.  But Bakelite is a little different.  When overheated, it doesn’t melt, but instead breaks down into its constituent parts, one of which (formaldehyde) smells nasty, and isn’t good to inhale.

Bakelite is safe to 350 degrees Fahrenheit; putting it in an oven is not a good idea.  The most common culprit for overheating is a gas stove where the flames are too high, and the lick up the sides of a sauce pan and heat the handles directly.

While we always assumed that overheating was the only ways to cause problems, there is at least one anecdotal report that once overheated, Bakelite may be sensitive to overheating at a lower temperature.

After many years steady use, I’m getting toxic fumes when I use them on anything but very low heat. It smells exactly like burnt plastic and the fumes seem unhealthful, not just smelly. I’m assuming it’s the handles, but they don’t seem degraded more than normal for their age. I do have a gas stove and tried lowering the flame, since the flames can lick around the edge of the pan and up toward the handles. But I am still getting the fumes strongly, even when the handles are very warm at all.

If you have the same issue, or if your handles have previously been overheated and seem sensitive to even lower heat, it is probably safest to replace your handles.  If replacement isn’t an option (you have one that we don’t make) you might try restoring them as described here, being sure to remove any Bakelite that looks damaged, to get to undamaged Bakelite.

To to sure, Bakelite is known to be safe as it has been used on cookware, and many other products, for around 80 years.  When used properly, there is no danger.  But it does have the potential for misuse if it is used in the oven or on too high heat.  It is better to be safe than sorry.

2

What the heck is a carborundum nano sponge?

One of the latest fads in cookware cleaning seems to be the carborundum nano sponge.  There are tons of YouTube videos that purport miracles they can perform, and a wealth of different vendors selling them on Amazon.com.  They claim to be able to perform cleaning miracles.

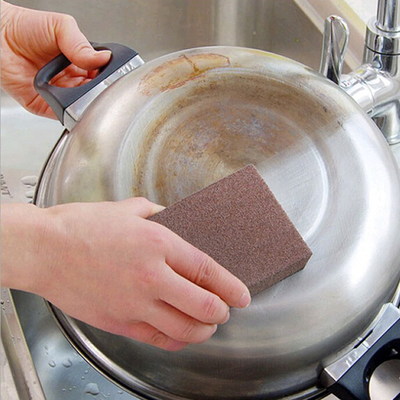
Here is a typical before and after photo.

Always being one to find a better way to clean my Revere Ware, I thought I’d give it a try.

So what is it?  Well carborundum (that’s a mouthful) is another name for silicon carbide, the second hardest substance known to man.  a carborundum nano sponge is just a sponge with a layer of carborundum along the outside.  Carpenters will notice these look and feel suspiciously like similar spongy sanding blocks they use.

The sponges do in fact feel just like a spongy block with some sandpaper on the outside.  From looking at them, I suspected they were going to function just like any other abrasive scrubber, and that is pretty much my take-away; they are just another abrasive scrubber.

Can they perform miracles?  Soundly, no.  The ability to remove gunk comes at a price, namely, you will scratch your cookware, as you might expect.  And they with the amount of elbow grease required, the results can hardly be called a miracle.

Here is an aluminum baking sheet before, and after a few minutes of scrubbing in the center.

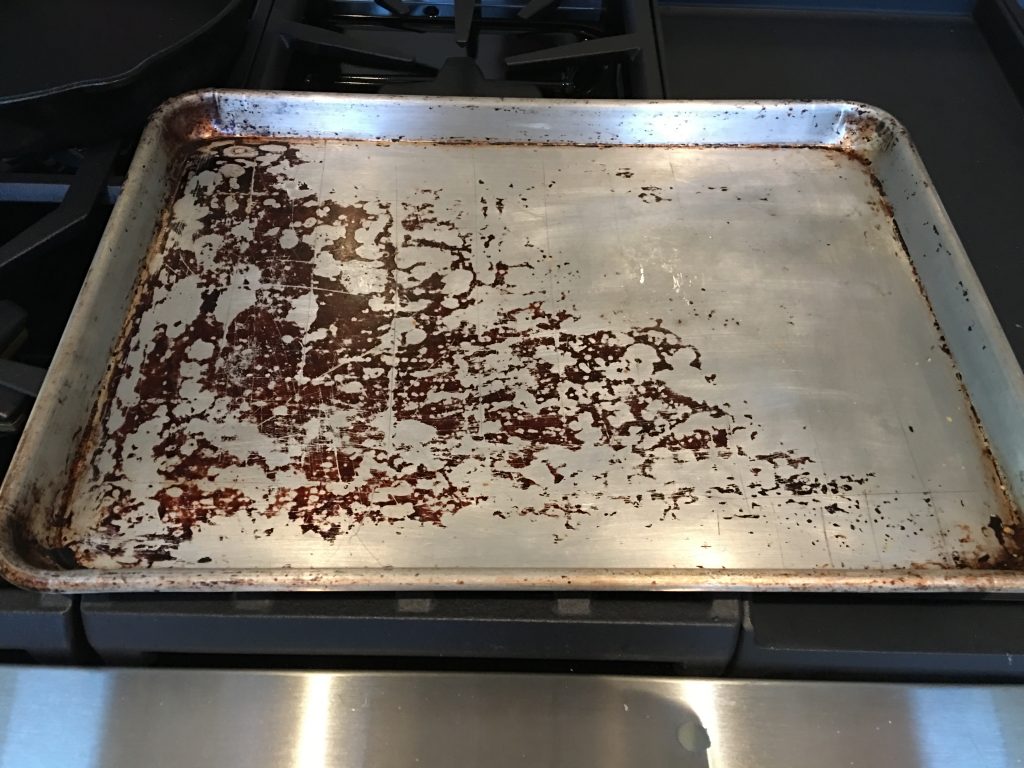
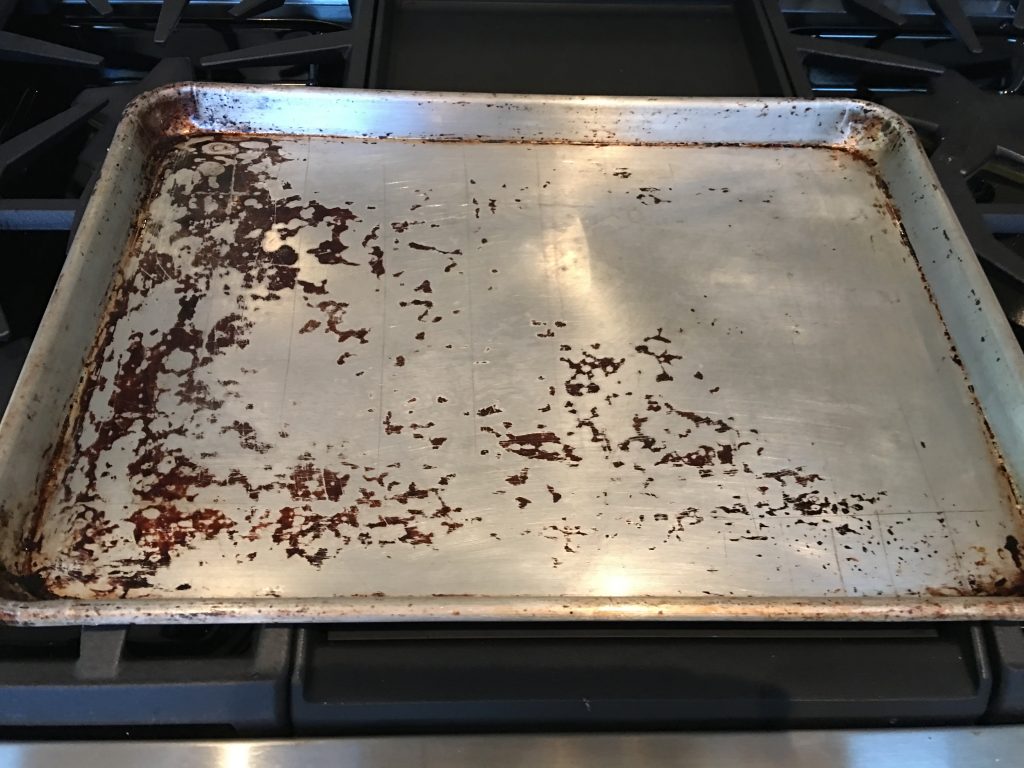
Better, yes.  Significantly so, no.  And the swirl marks from the abrasive nature of the scrubber are clearly visible in the aluminum.

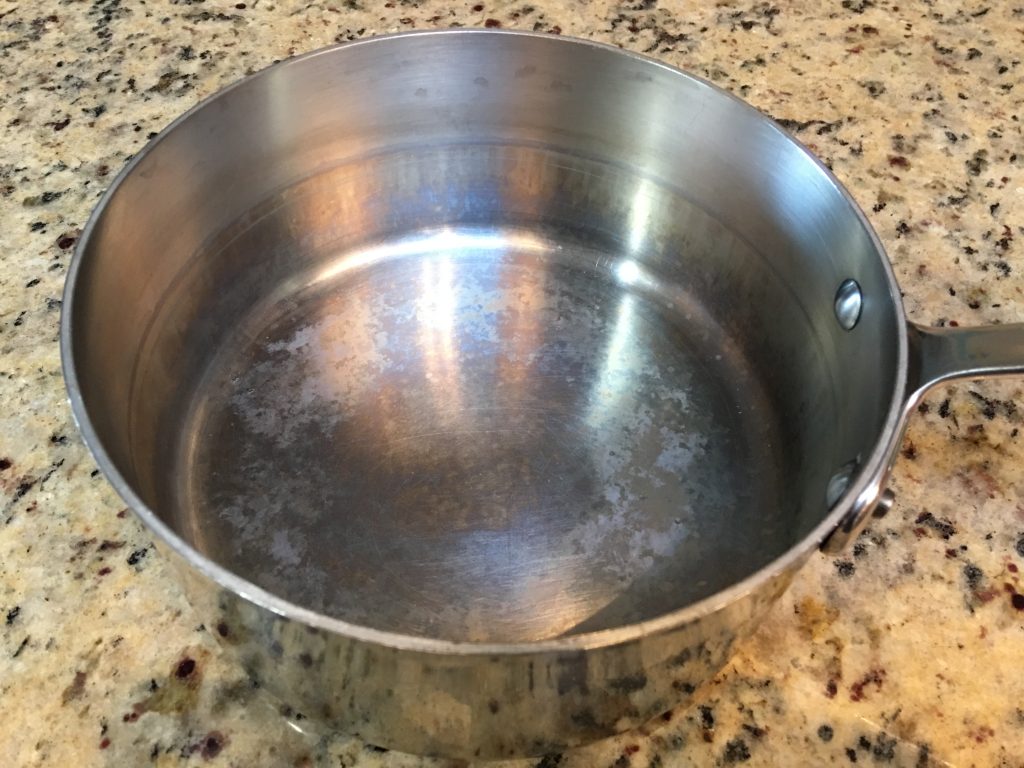
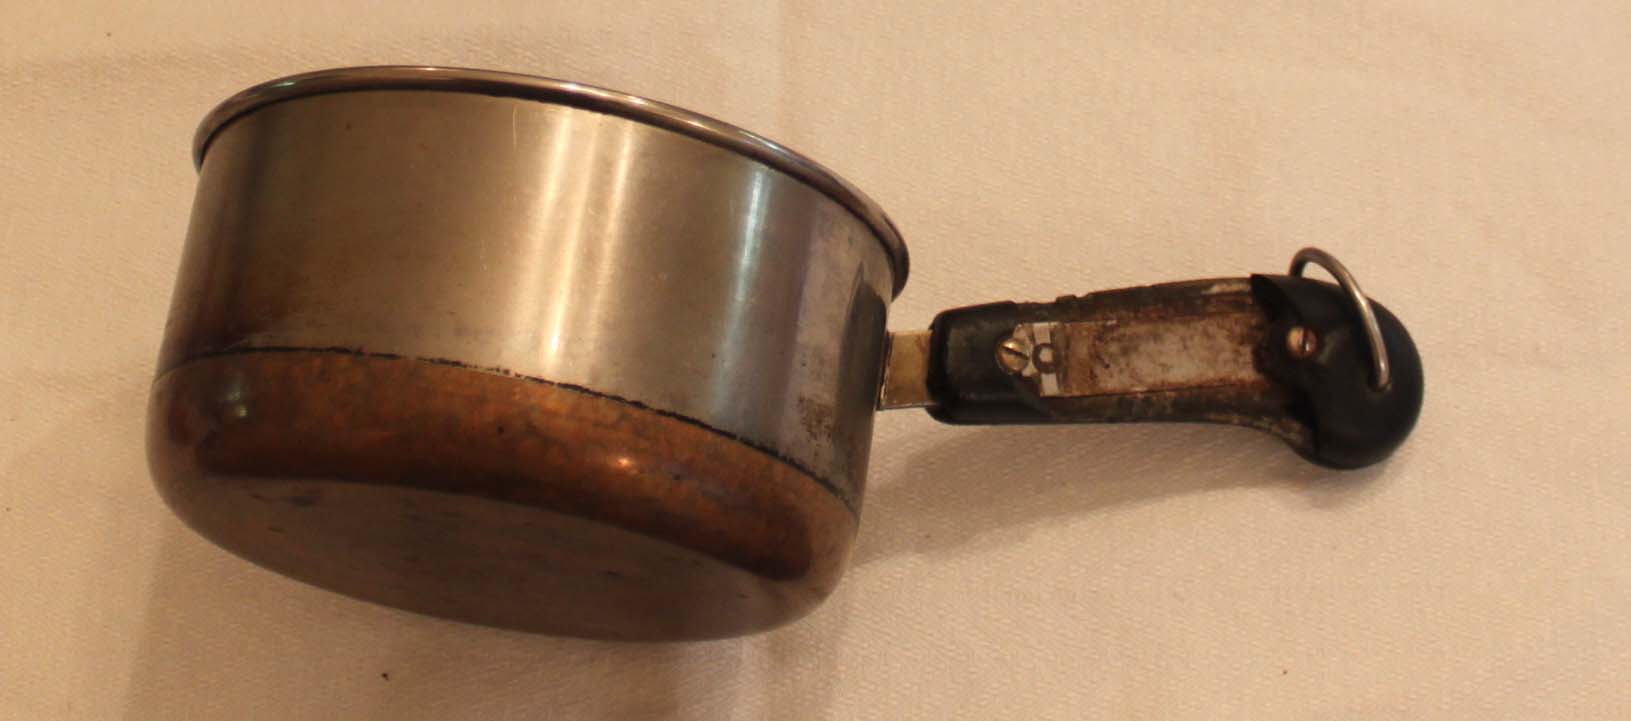
So what about some really caked on great on the bottom of a Revere Ware pan?  Here is another before and after, also after a few minutes of scrubbing.

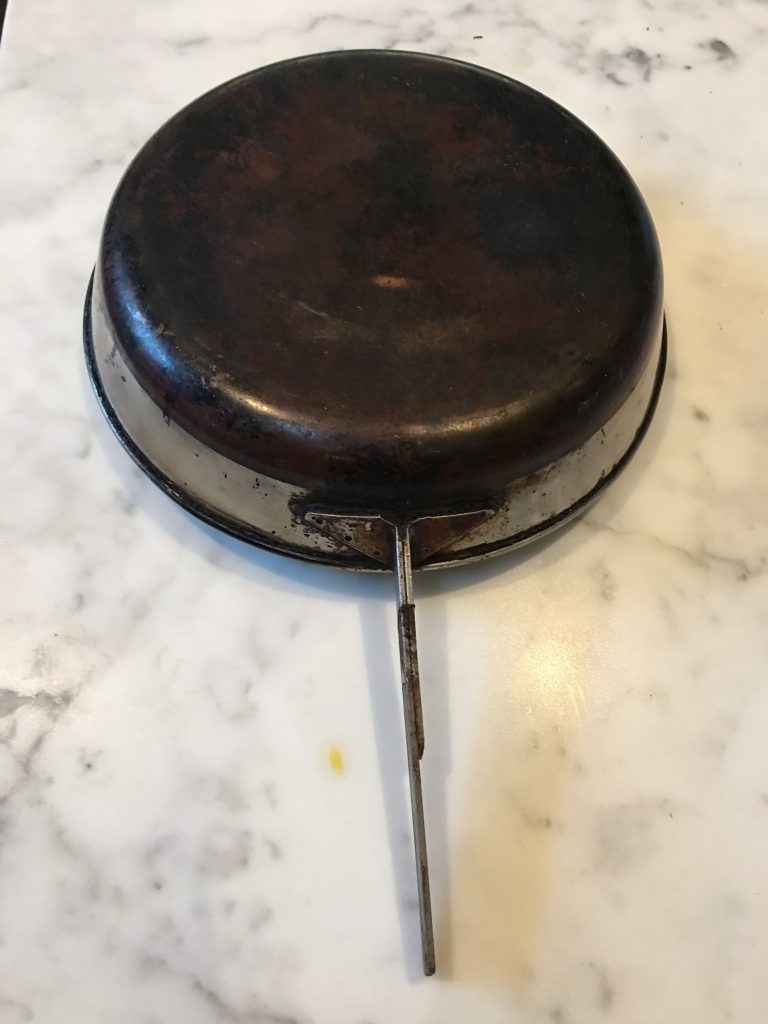
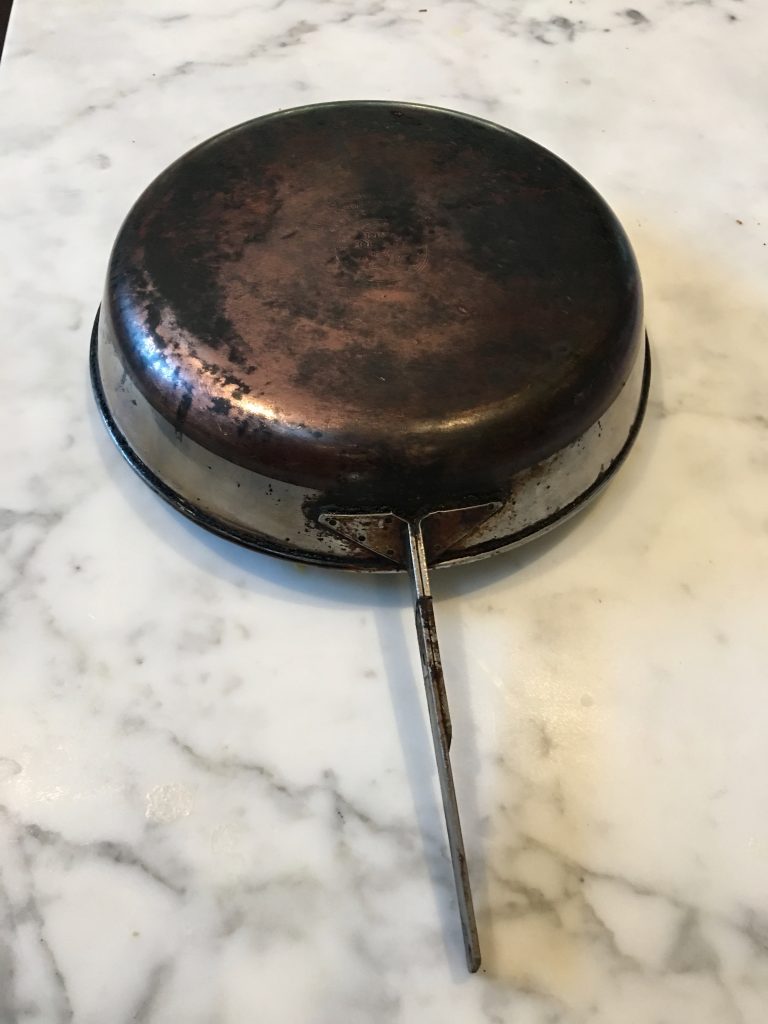
If you are struggling to see much difference, don’t worry, it’s not your eyesight.  Making progress with this sponge is pretty difficult.

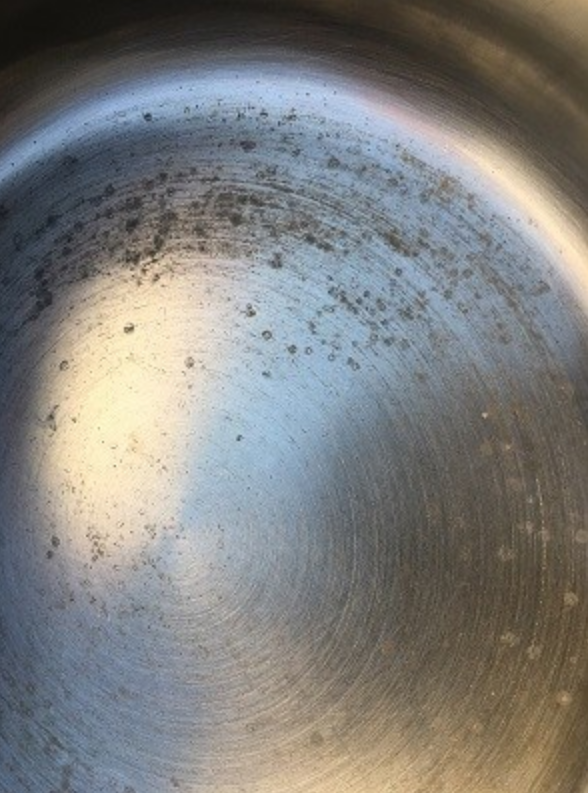
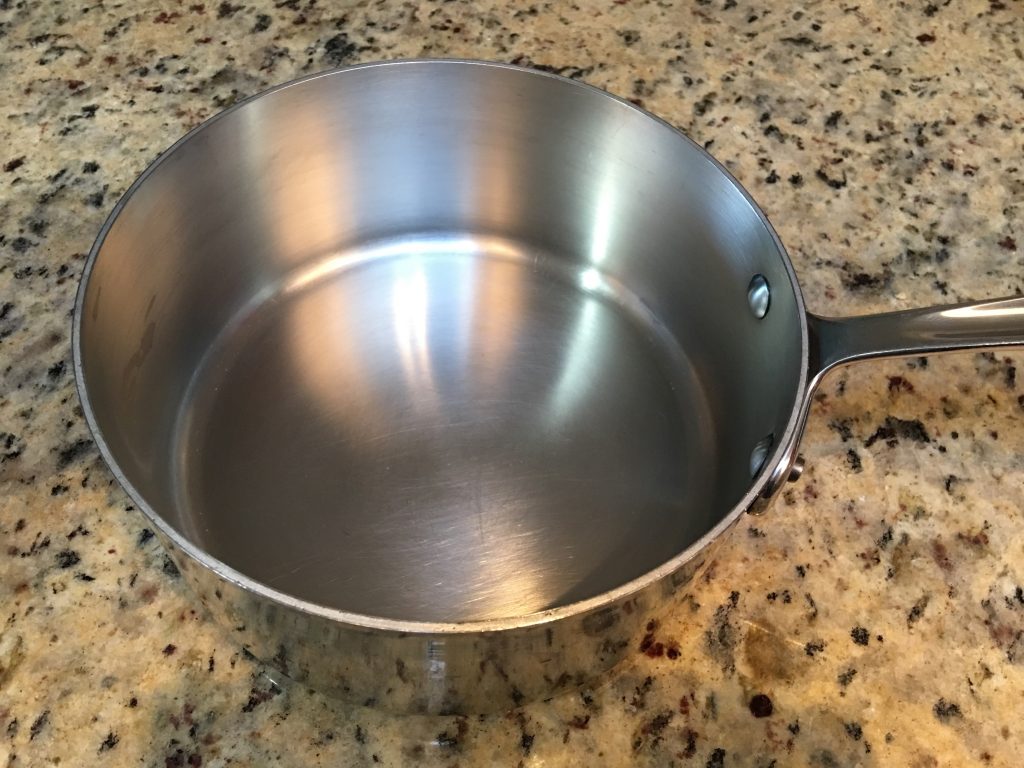
I also tried the sponge on a the outside stainless part of the pan.

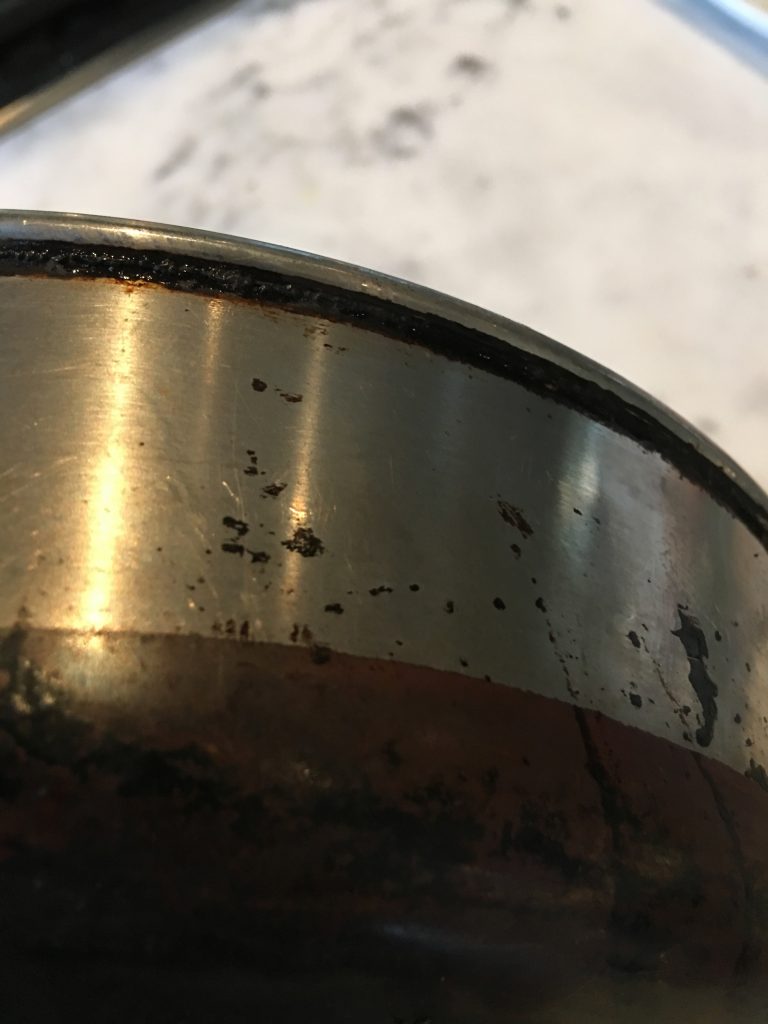
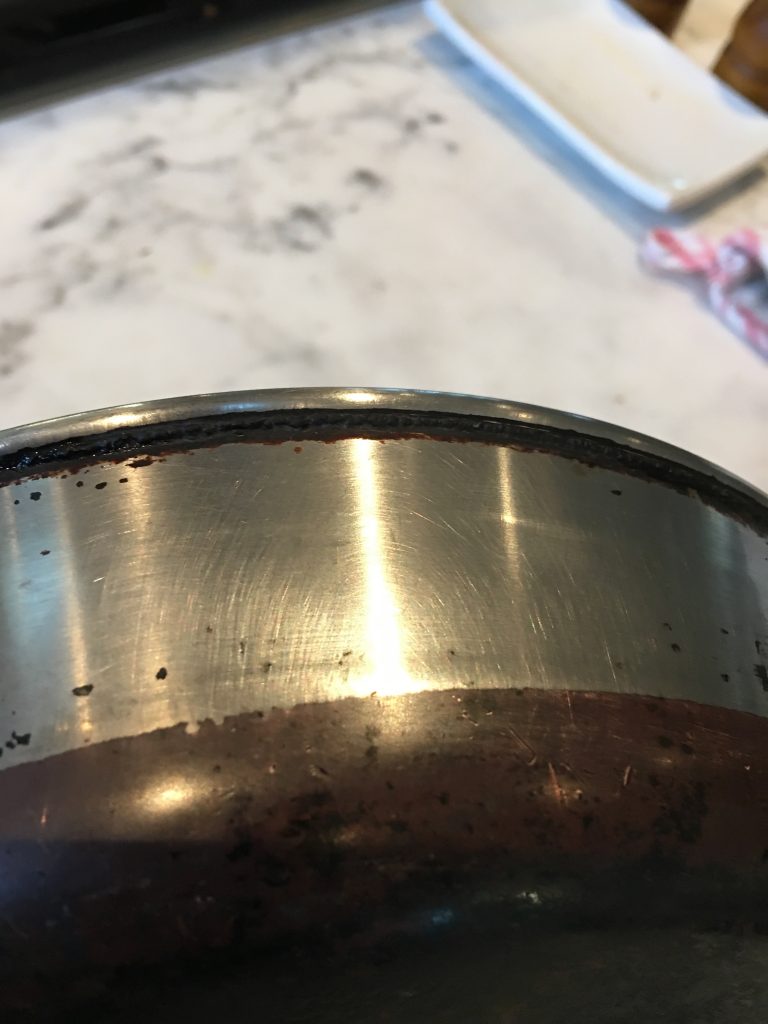
The first picture above shows an untouched area.  The second shows an area I scrubbed with the carborundum nano sponge; you can clearly see the swirl marks it created in the stainless steel.

Now, there are two things to consider here.  First, these sponge are almost all certainly made cheaply by Chinese companies.  For all we know, the material on the outside may not be (and probably isn’t) carborundum.  If it is, it probably isn’t “nano”, whatever that means.  Second is, does anyone really think that scrubbing a polished surface with the second hardest material know to man WON’T scratch it?

My advice is give these sponges a pass.  If you want to get the burned on gunk off the bottom of your pan, try the method outlined in our cleaning guide for better results that won’t scratch your polished stainless finish.  Or, try one of the new methods we came across recently for items too big to dunk in a big boiling pot.  We’ll get around to trying those ourselves one of these days.


2

Restoring Bakelite when replacement isn’t an option

We sell a good number of replacement Bakelite parts, but it just isn’t economical for us to produce everything.

When replacement isn’t an option, you can try to restore the Bakelite part.  Here is a good tutorial on an old Bakelite radio.

In short, clean the piece, rub it thoroughly with 1000 grit steel wood, and then polish with Brasso.  I’ve also heard that Simichrome polish works well and might have a little bit of chemical reaction with the Bakelite that helps the restoration.

2

Vintage cast iron pans

As far as I’ve always been concerned, cast iron is all about the seasoning.  You can take just about any cheap abused cast iron pan, clean and season it well, and it will perform like a champ.

In fact, that is exactly what we’ve done personally, purchase some basic cast iron pans at thrift stores, and clean and season them.

But, I am also a huge fan of history.  So while I don’t think a vintage cast iron pan would necessarily perform better (feel free to make an argument against this presumption), The idea  of owning an using a cast iron pan that has been around for 100 years, is interesting.

Along those lines, here is a video on how to identify vintage cast iron cookware.

Now, the video raises an interesting point about older models having a smooth finish, vs newer models having a rougher finish, which made me wonder, which is better.

Here is an article which discusses the difference, although has a much more complex explanation of why newer pans are rough and older ones are smooth.

The entire concept of seasoning cast iron, which acts as a leveling agent so the proteins won’t adhere to the pan, was a result of home cooks trying to fill in this new, rougher surface. The roughness that you feel on much modern cast iron is sand, which used to be removed during the cast iron production process. However, that step has since been removed by many modern manufacturers. “A lot of cast iron today is produced in 90 minutes,” says Powell. “But at the turn of the 20th century, cast iron would sit in molds for upwards of 48 hours before then being tumbled for 24 hours before it then received its final packaging.” As a result of this, vintage cast iron was incredibly smooth.

Ah, so it turns out that not all cast iron pans are equal, and older ones with a smooth finish are much easier to maintain, don’t require the same level of seasoning, and generally work better.

I’m off to the thrift store to try and find a vintage cast iron pan.

2

Improving dishwasher-worn Bakelite

Prior to our providing new Bakelite parts, the only option we knew of restoring faded dishwasher-worn Bakelite to its original look was a complicated process of repeated sanding process with finer and finer sandpaper offered by one restorer.  They came out looking decent but it was a labor intensive (and expensive) process.

Availability of new handles made the a non-issue for many parts, but there are still some that we don’t produce, like the very early Revere Ware cookware handles.  If fading (probably from repeated washing in a dish washer – see our test) is the issue, then we just came across something which might help.

We recently came across a blog post that talks about restoring Revere Ware pots and pans.

Their suggestion for Bakelite is:

What you need to do with these is actually use Mineral oil and rub it into the handles. Let them sit for a while (mine sat for a day) and then wipe off any access oil. This will bring them back to looking good.

From the pictures, there does seem to be quite an improvement:

Before:

After:

There does appear to be considerable improvement, although you can easily tell the difference in the after photo between the original Bakelite shine on one handle, and the rest of them with mineral oil restoration.  For parts that simply aren’t available anymore, it can probably make a difference.

4

New trick for removing hard water stains from stainless steel – aluminum foil and vinegar

We recently came across this post with a neat trick on removing hard water stains from stainless steel.

A coating of mineral deposits from hard water is a fact of life in stainless steel cookware that is used to cook with water that has any hardness.  With our sauce pans, we often have to scrub the hard water coating off about every other time we boil water for soft-boiled eggs.  Our water is around 40+ grains of hardness, and we have a water softener.  Still, the hard water coating is a fact of life.  Here is what it looks like:

Usually, we just use a green Scotch-Brite pad to scrub it out.  It does dull the inside, but if you cook with metal utensils, or have had your sauce pan for any appreciable time, the inside is already fairly dull.

This new trick involves using vinegar (they say apple cider vinegar but I’m sure white vinegar or any other type would do well) and a scrunched up piece of aluminum.  We tried it with white vinegar.  The first thing to notice is that as you scrub, a black residue is left on the bottom of the pan.

That makes me think there is some kind of chemical reaction happening that involves the hard water residue (calcium or magnesium carbonate), the vinegar (acetic acid) and aluminum (just Al).  It is known that acetic acid will dissolve calcium carbonate (and presumably other mineral carbonates), albeit, in my experience, slowly.  It is also my experience that scrubbing hard water stains with a soft scrubbing material (like a non-metal kitchen scrubbing sponge) will hasten the dissolving of the hard water stains (abrasion and agitation).  Is the aluminum just acting as an abrasive surface, or is it doing more to chemically remove the hard water?

In any event, the trick seems to work quite well.

Given the softness of aluminum, I can only imagine that it is less abrasive a method than the Scotch-Brite scrubbing.

Speaking of aluminum, here is an interesting side fact; if you’ve ever wondered why one side of aluminum foil is shiny while the other side is dull, the short explanation is that, aluminum goes through rollers to make it progressively thinner and thinner, while stretching it out, to get it from a thick ingot, to being thin enough for aluminum foil.  On the last step, two sheets of foil go through the same set of rollers.  Where each sheet comes in contact with the roller becomes the shiny side (it is being pressed on by a very hard steel surface) while the side where the two pieces of aluminum touch each other becomes the duller side.  Here is a longer explanation.

You might also ask if the shiny side or the dull side is better for keeping in the heat when you cover a dish with aluminum foil.  The answer is, it doesn’t matter.  My daughter just did a science experiment where she created a device to measure the reflectivity of various materials, one of them being aluminum foil.  The shiny and dull sides had virtually identical reflectivity, and reflecting the infra-red energy back into the dish that is covered is what helps keep it warm.


2

Some new cleaning tips

We came across this article entitled How to Clean Pots and Pans You Thought Were Ruined the other day, and found some techniques that look promising.

Here are the ones we like the best:

Use ammonia to remove burnt on great on the bottom of your pans

Burnt on bottom grease is one of the most difficult things to remove, and I’ll admit, this looks simpler (if not more toxic) than our method of boiling a piece in a large pot with baking soda.

Use baking soda and hydrogen peroxide to clean baked on grease on your cookie sheets

Spray hydrogen peroxide on the baked on grease stains on your cookie sheet. Sprinkle with baking soda. Let mixture sit for a few hours and scrub away with brush.

Just yesterday I was scrubbing away with a Scotch Brite pad making little progress, so this seems really interesting.

Use a Magic Eraser to clean baked on grease on glass bakeware

A Magic Eraer works wonders when cleaning baked on grease from your glass dishes and bakeware. Must try!

I tend to use a Scotch brite pad here as well, which definitely can scratch the glass, so the Magic Eraser method is much better.  I can’t help but think that this would work well on the outside of a tea kettle as well, which gets a lot of grease splatter.

5

Removing old 2-screw handles

Consider the handle above, which has clearly been on that pan for quite some time.  You can see that lots of grease has crept between the handles over time, and gotten baked on by the heat of stoves.  Such crud makes it very had to get old handles off sometimes, and these are by no means anywhere near the worst I have seen.  Additionally, despite being stainless steel, the screws and barrel nuts are known to rust together, or get stuck on with thick grease.

Our own recommendation for the removal of suck stubborn handles prior to replacement has been to simply break the handles off if they won’t come off by gentler methods.

Reader Phil has some better suggestions on this topic.

I’ve been restoring pre-1968 revere ware so i can have a set of amazing cookware, without spending thousands of dollars. I have been using a few tricks to get seized handle screws out, without destroying the handles completely.

#1. Use heat. I use a stick type soldering iron, tinned so you get good heat transfer to the nut and bolt sections of the handle hardware. The solder wont stick to the hardware because its not fluxed, but it will heat it up and boil any grease holding the hardware together. Also if metallic corrosion is present it will expand the hardware to hopefully free it up.

#2. While hot, use a precision flat tip screwdriver (similar to eye glasses screwdriver) to wedge between the ‘head’ of the nut hardware part and the handle hole it sits in, and lightly turn the precision screwdriver to hold the nut section, while using a standard size screwdriver to turn the bolt section of the hardware and separate the two.

If done correctly, you can save the handle without damaging it, and be able to inspect and clean the ‘tang’ (the metal that the handle bolts to). Be warned though, ive removed handles that appeared good on the outside, only to find the inside was overheated and dish-washered numerous times and the Bakelite was brittle and cracked on the inside. If that’s the case, buy new handles from RevereWareParts.

We certainly appreciate the last part.  🙂

5

When food sticks to the inside of your stainless steel pan

Customer Paul writes:

I was wondering if there is a way to cure my frying pans. The food.I cook seems to stick too easy no matter if I use oil or butter in the pan.

We can think of a few things that might be happening.
If you have ever used steel wool, that can leave little bits of itself stuck to the stainless steel and promote food sticking and rust.   Cleaning as outlined below will likely help with this.
If you have hard water, an invisible layer of hard water deposits can definitely cause food to stick.  Give it a good soak in 50% vinegar and water and then scrub the inside thoroughly with a green Scotch Brite pad.
You can also try using Bar Keepers Friend to polish the inside and try to get food to stick less.
Other than that, we just recently wrote a blog post on seasoning stainless steel.  We haven’t had the chance to try it yet, but are really curious if anyone has success with this.
0