Top Menu

Archive | Care

Removing walnut stains from a marble countertop

I pride myself on savvy kitchen problem solving, but this one had me stumped for a bit.

We have a nice big white marble island in our kitchen.  From time to time, it will get a stain, like the time the kids left a pink feather on the counter and it got wet; pink stain in the marble.

My go to for stains natural stone has been a baking soda poultice, which you get by just mixing baking soda with enough water to make it the consistency of toothpaste, apply over the stain liberally, cover with plastic, and it will pull the stain out of the stone.  Mu understanding of how this works is that the water travels constantly between the stone and the moist baking soda, and the baking soda has a higher affinity to capture the stain molecules than the stone does, so eventually all the color ends up in the baking soda.  Works like charm.

But it doesn’t work on every stain, and there are many types of poultice designed for specific stains.

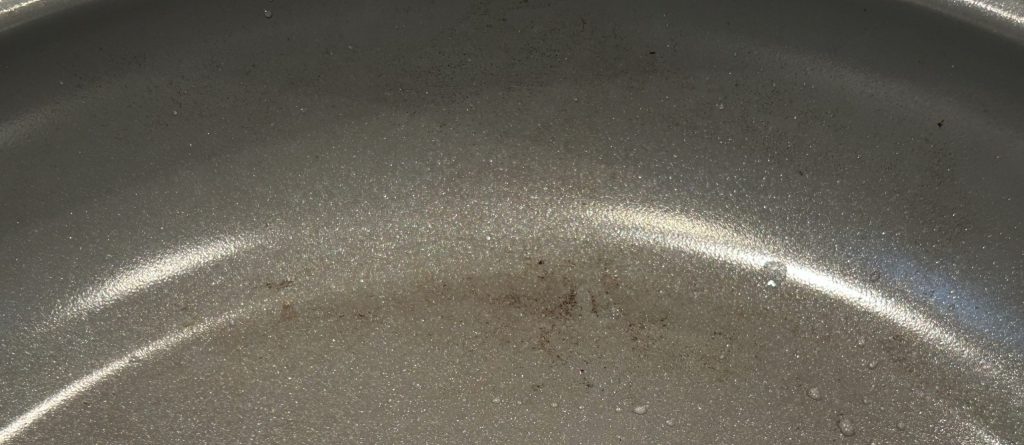
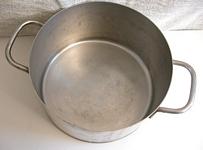
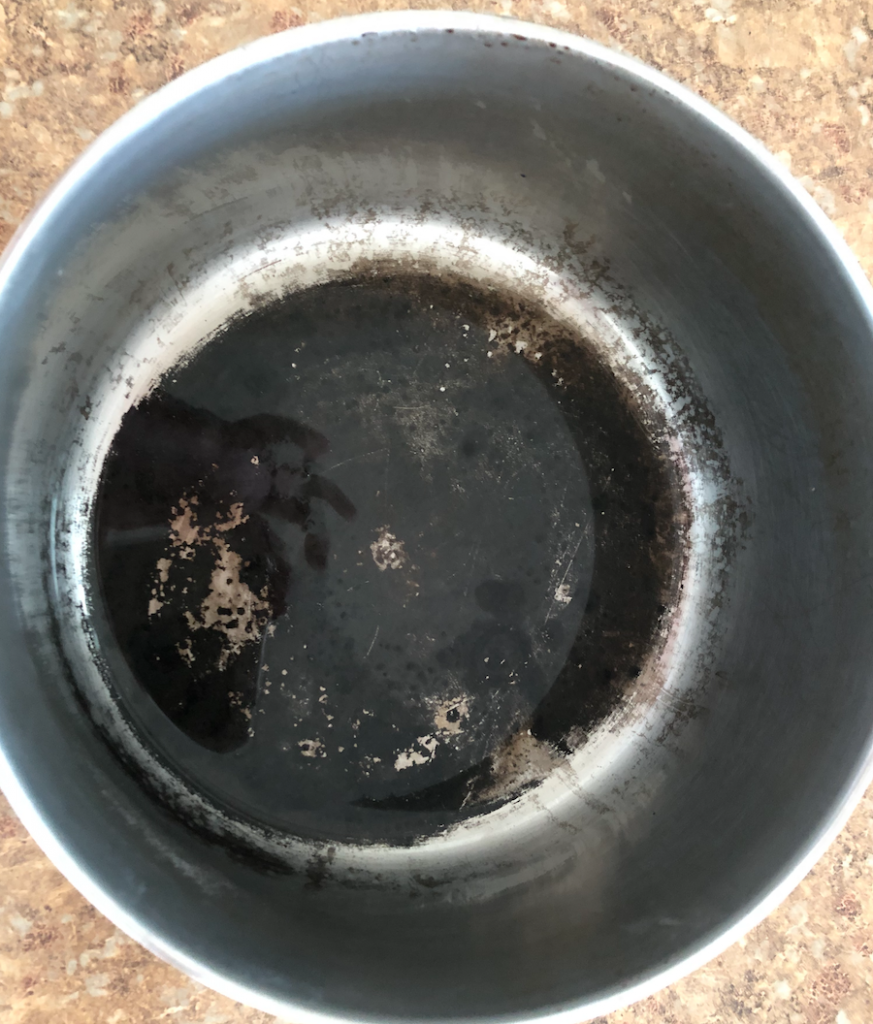
About a week ago, my wife was soaking walnuts. We soak them to remove the bitterness (and make them easier to digest) and then dry them in our dehydrator.  But this time someone bumped the bowl and some of the water got out and formed a puddle on the counter.  A few hours later when I went to wipe it up there was a nasty brown stain about 10 by 18 inches long.  It looked kind of like this, but much larger and slightly darker (I wish I had taken a picture).

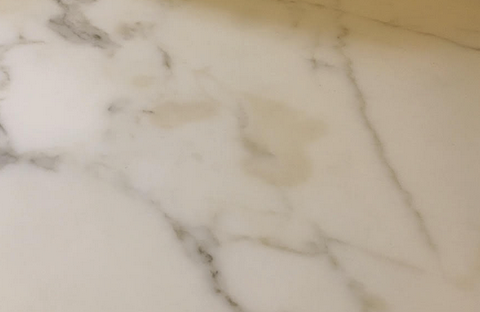
My trusty friend, the baking soda poultice, had no affect on this stain.  I even let it sit for several days.   I was a little worried that this stain might be permanent.

Searching the internet for how to remove walnut juice stains doesn’t bring up a lot of answers, as I think it isn’t a very common problem. Who other than the odd nut like us actually soaks walnuts?

I did find one roundabout reference to trying bleach on some stains.  So tonight I sprayed some bleach water on the stain, and let it sit for a few minutes.  Almost like a miracle, the stain … just … disappeared.

I still can’t quite believe it.  I am quite relieved.

Hopefully this blog post makes it easier for someone else to find this solution directly.

0

A tip to start out the new year – Magic Eraser sponge vs Melamine sponge

If you like mu Scrub Daddy sponge tip, you’ll love this one.  Magic Eraser sponges are great, and can remove marks from walls and what not; but they aren’t cheap.

While researching how to fix a ceramic non-stick pan that my daughter (for the second time) put on too high of heat and burned in some butter, I found a tip to try a melamine sponge. So I ordered a pack of 48 for $16, or 33 cents each.

After some serious scrubbing with other means, here are some stains on the pan.

Here is after some working with the melamine sponge.

So, back to Magic Eraser sponges; as it turns out, melamine is exactly what Magic Eraser sponges are made from.  Magic Eraser sponges cost around $1.26 each, or 4 times as much as a no-name melamine sponge.  So, save yourself some money and buy plain melamine sponges instead of Magic Eraser sponges.

If you’ve ever used a Magic Eraser sponge, you will know they aren’t quite magic; you have to put some effort into scrubbing, and the sponges wear easily and don’t last long.  Working on these burned in grease stains was no different.  In the end, it did make a difference, after some working.  So I can definitely recommend these sponges for problems like this, both from a cost-effectiveness standpoint, and that they get the job done.

I tried to find a Revere Ware pan that had a similar problem.  However, for stainless steel pans, there are other good tools.  For the inside, a Scotch Brite scrubber does a great job, and for the outside, Bar Keepers Friend works really well (as we recently wrote about) and helps keep the shine.


0

Keep a Bar Keeper as a Friend

We had friends over for a traditional Swiss dish called Raclette, which is essentially melted (raclette) cheese over potatoes.  In days of old they would put a large wheel of cheese by the fire and scrape off the melted portion.  In these modern days, we have electric Raclette grills.  One of our grills has a stainless steel cover which sometimes gets melted cheese on it, which can get seriously burned in leaving those tough grease stains you often get on the outside of stainless steel cookware (and especially tea kettles which get splatter from cooking which then gets burned in as you heat the kettle).

I was reminded today just how miraculous Bar Keepers Friend is at polishing away stuff like this.

It really is the best thing to keep the stainless outside of your Revere Ware looking marvelous.  It can also help smooth out the inside and remove small pits that might otherwise cause food to stick.

If you haven’t tried Raclette, you don’t need a grill, and the cheese is fairly common these days; we bought ours at Trader Joe’s (but it is popular these days and often sells out during the holidays).  If you aren’t using a grill, just put your already cooked potatoes, slightly cut up, in a serving dish (like good old Corning Ware) and put it in the oven or microwave oven with the cheese on top, heat until the cheese is melted (and just a bit bubbly) and serve.  It is absolutely delicious. The cheese from Trader Joe’s comes pre-sliced, making things very easy.

And if you are ever in Switzerland, I highly recommend touring a Raclette cheese factory.

0

Best of Revere Ware blog – Is Revere Ware oven safe

We have answered this question via our customer support perhaps 100 times, and first wrote about it on our blog back in 2013.   It’s been in our care guide probably since 2009.  It is still one of our most common questions we get.

As far as we know, Revere Ware did initially claim that their cookware was oven safe to a temperature of 350 F.  But in later years they revised their recommendation to not use Bakelite parts in the oven at all. The change is probably due to the fact that earlier ovens were gas fired from the bottom and tended to heat evenly where newer ovens (electric) can heat from a broil burner and areas of the oven (near the top) can easily exceed the safe temperature for Bakelite (350 degrees F) even with the oven temperature set to below 350.

Even worse, modern ovens have a rapid preheat cycle that will use very high settings on the electric coils to get an oven up to operating temperature up fast.

The problem is that, if you overheat Bakelite, it won’t just melt.  Bakelite is a phenolic plastic, which is made from, among other things, formaldehyde.  If you overheat Bakelite it will break down and release the formaldehyde. Trust me, it smells bad and you don’t want to experience this.

If you really want a Revere Ware Dutch oven that you can put in the oven, look for some of the all metal pieces, such as from the Institutional / 5000 line, or the 1800 Patio Ware line.  You’ll get that iconic copper bottom and something that is oven safe.  See our photo guide for more information on these and other lines.

Patio Ware / 1400 line


Institutional / 5000 line


0

Dealing with burnt on grease

Reader Ellen asks:

“Hello!”  I purchased a small old-style fry pan in an “antique” store.  There is no copper on the bottom.  Unfortunately, my husband decided to use it – on high – and seared grease into it!
I have tried Brillo/SOS; baking soda; soaking.  What will get this grease sear off?
“Thank You!”
In terms of burnt on grease, what I’ve used for grease splatters on the outside of tea kettles is to put some water in it, heat it up (to make the grease stains hot) and then use some Bar Keepers Friend (a fine polishing powder) to polish them away.
Dealing with burnt on grease on the inside of a probably poses more difficulty because it isn’t a finely polishes surface like the outside; It may have started that way, but years of metal utensils and acidic foods can leave the inside of the pan with many pits and grooves for the grease hid in.  Still, the same trick may work, with a little more elbow grease.
My recommendation is to heat the pan slightly, and then give it a good scrubbing with a green Scotch Brite pad and some soap and water.  Then heat it up again and give it a good polishing with Bar Keepers Friend.  If this doesn’t get all the grease stains off, repeat as often as necessary.
The only thing to watch out for is, with a heated pan, don’t douse it with cold water as you will risk warping it.  Better to heat the pan mildly and use some warm water for the soap and water part, and any rinsing.
0

Aluminum and dishwashers; just say no

Reader Michael asks:

I have a pre-1968 Revere ware percolator and the inside of the grounds basket is black. Ive noticed this on a lot of revere ware percolators for sale. Is this normal? Is that pump assembly not stainless steel?

I was a bachelor for quite some time before getting married and having kids, and I learned a lot of domestic tricks during that time.  One of them was to never put anything aluminum in the dishwasher.  If you do, you will be sorely disappointed.  The basket assembly on the Revere Ware percolators is indeed aluminum.
The high temperatures and harsh chemicals of the dishwasher (see our recent article on drinking glasses) cause the aluminum to oxidize, coating it with very unattractive black layer. Here is a poor guy from Reddit who put is Bialetti espresso maker in the dishwasher.
As it is explained there:
This is caused by a chemical reaction between the soap and the aluminum producing Hydrogen. The reaction is exacerbated by the lack of phosphates in the detergent, high temperature water, and long soak time in the dishwasher.
So what do you do if you’ve made the mistake of putting a prized aluminum piece in the dishwasher?  I’ve always used something like a green Scotch Brite pad to physically scrub the oxidation off.  If you have a piece that used to be shiny, this will definitely dull the shine, which you can try to restore using Bar Keepers Friend.
I found this blog post that suggests using vinegar to remove the black layer, but I haven’t tried it (because I no longer put my aluminum in the dishwasher ha ha); they also have some other useful suggestions.
The best tip though is to just avoid putting aluminum in the dishwasher.
Oh, and wooden items too; they will swell up and won’t be the same ever again.


0

The best of RevereWareParts blog: May 2010 dishwasher test

In spring of 2010 I decided to do a test to see how well Bakelite held up in a dishwasher.  If you want to preserve your Bakelite, best to wash by hand.

Bakelite Dishwasher Test

Previously, when figuring out whether Bakelite was dishwasher safe or not, I had to rely on my own anecdotal evidence, far from scientific. Finding that less than satisfying, I decided to perform my own test to see just how well Bakelite held up in the dishwasher.

The test was simple; I attached two Bakelite handle halves to the dishwasher rack with zip ties, one on the top rack, and one on the bottom.  In our household, we do about a load of dishes each day, so it is safe to say that the number of washes is about equal to the number of days in the dishwasher, within a few percent.

After two months, or 60 washes, I began to notice a little bit of fading and dulling of the shine on the Bakelite. Below is what the handles look like after six months, or 180 washes.  The darker/shinier handle is the unwashed (new) comparison.

Clearly, the Bakelite has suffered as a result of washing in the dishwasher.  There was no difference between the top rack and bottom rack; both suffered equally.

I can now say with great confidence that you should refrain from putting your cookware with Bakelite parts into the dishwasher.


1

When your Revere Ware boils dry

Reader Nedra contacted us with a pot that had boiled dry with water and left black stuff all over the bottom.

Hello,  I have a 2 quart pan that I left on the stove too long.  The water that was in the pan completely
evaporated and left the bottom of the pan black.  What do you recommend to clean with?  I am so
upset….one of my favorite go-to pans.

Sometimes heavy hard water deposits, which you will always have some of when you boil a pot dry, can get charred black like this. Regardless of what it is, the best approach I’ve found is heating up some vinegar and powdered dishwasher detergent.  I have no idea why powdered is better than liquid, but that is what I’ve always used and it works.

We first tried this when my wife was making simple syrup (sugar and water) and boiled the mixture dry.  That smoked quite a bit and brought the fire department, as we had smoke detectors through our alarm company.  The firefighters were pleasant and somewhat amused.

Given the rock hard layer it left behind, we thought the pan was a goner.  But lo and behold, repeated heating and scraping with a flat metal spatula got most of the stuff off and a green Scotch Brite pad took care of what remained.   But that’s not the only method.  Here is what Nedra did:

Thank you for getting back to me so soon.  I did put baking soda and apple cider vinegar, that’s all I had on hand.  I left it over night and it seems to be lifting a little bit. I’ll buy straight vinegar today.

And then:

First I coated the pan with oven cleaner and left it on overnight, nothing.  Then I added baking soda and white vinegar and let that sit for a few hours.  Did it again but this time heated the pan.  I used a steel wool pad with soap and elbow grease and low and behold I have my shiny pan back   I’ve attached before and after photos for you.

Now, a couple of words of warning here.   Oven cleaner can cause pits in your stainless steel so is not recommended.  Steel wool can leave little bits of itself behind which will promote rust.  It is best to stick with a Scotch Brite pad for scouring and, if you want a bit more of a polish, use Bar Keepers Friend.

But, don’t use a Scotch Brite pad on the outside of your cookware as it will dull the finish.  On the inside, this is ok as the finish gets naturally dulled by acidic foods and metal cooking utensils.  Bar Keepers Friend however is good for both the inside and outside of your stainless steel cookware and is a great way to bring back some of that shine.


0

Bakelite problems

Reader Eileen contacted us this week with an inquiry about her Bakelite handles emitting a foul odor:

I use my Revere pots and pans daily. Today, while making my younger children mac n’ cheese, the handle to the pot started to melt. The chemical smell caused us to evacuate the house for several hours.

This presents a good opportunity to talk about safely using cookware with Bakelite handles.

The biggest danger to Bakelite handles is a gas stove.  If a small pan is put on a large burner such that the flames, or the heat licks up the sides, it will cause the Bakelite to fail and emit this foul odor.  Bakelite is a phenolic plastic; it doesn’t melt when overheated, it breaks down into its constituent parts, one of which is formaldehyde, which is the foul odor Eileen smelled.  Despite the potential risk for this type of failure, we hear very few reports of this type of problem.

However, one issue is that, as Bakelite becomes older and damaged, it will fail through overheating much easier.  Repeated washes in a dishwasher can cause damage that will make Bakelite much more susceptible to overheating.  We did a dishwasher test and have shown that it doesn’t take a lot of repeating washings in the dishwasher for the handles to show visible discoloration, a prelude to the type of damage that can make them more sensitive to overheating.

The other risk to Bakelite is using pieces with Bakelite in an oven.  You might think a Dutch oven was intended for the oven, and when Revere Ware first started selling their iconic cookware they did offer it as oven safe.  But some time later they reversed their position and no-longer suggested it was such.

Bakelite is safe up to 35o degrees F, for a limited time.  But modern ovens can often have hotter spots within them, especially when they are heating up.  We don’t offer our parts as oven or dishwasher safe.

So our three safety tips for the day for cookware with Bakelite handles are:

  1. Never use them in an oven
  2. Wash them by hand, not in a dishwasher
  3. Take care when using them with a gas stove, not to turn the gas up too high
1